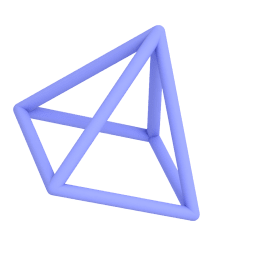
Design in 3D.
Publish Anywhere.
Create beautiful designs — photos, presentations, or 3D models — using a library of content and easy-to-use tools in uMake app for iPhone, iPad and Mac (Apple Silicon).
Get Started
Watch Video 


3D Design. Easier Than Ever.
Design quickly with a touch of a button. Choose from a rich library of templates, elements, textures: from furniture to graphic design assets.

uMake gives you complete freedom to transform your imagination into a reality. You can create anything from a simple 3D object to an entire 3D scene. Start from a template or quickly drag & drop 3D elements, textures, HDR environments, fonts, photos, etc. into your canvas.
Discover uMake+

Templates

Elements

Textures

Environments
All the tools you need, on the go
Designing in 3D is now easier than ever. Drag and drop from the content library, or draw precisely using the precision tool. Everything you need is within reach.
Designing
Easy & Simple
Create 3D text in seconds, or drag & drop shapes and objects from our vast content library. Already got something? It's a cinch to import file types like SketchUp or OBJ. Rather draw it yourself? Use the freestyle tool to sketch and doodle rapidly in 3D. Let your ideas flow!
Learn More3D Modeling
Precise & Powerful
When precision matters, uMake puts you in control. Draw perfect lines, arcs, and angles, and specify exact dimensions. Push and pull extrusions or cutouts. Chamfer and fillet corners, and loft or revolve curves to create complex 3D surfaces. With intuitive inputs and powerful features, it's easy to model the shapes you envision.
Learn MoreExploring
Infinite Creativity
When you're brainstorming, iterating, or problem-solving, freedom to explore possibilities is key. Stay organized with layers. Try different looks with drag-and-drop textures and materials. Compare and share ideas instantly with fast renders, annotated slides, and saved views!
Learn MorePresent your ideas
in the best light
uMake's groundbreaking on-device rendering feature will make your designs shine in a new light! Create full presentations using the Slides feature or quickly annotate and mark up your design using the Markup tools. Everything you need, all in one place.
Learn More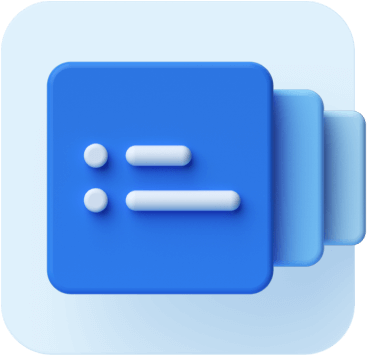
Smart slides
Configure each element in your scene slide-by-slide. Create different content variations or tell your story from different angles.

Powerful rendering
uMake is the first design app to bring on-device rendering to iOS devices. Create beautiful, rendered images of your creations with a tap of a button.

Make your mark
Capture your views. Write, draw, and mark up your slides with custom notes and sketches.


Share & Publish Anywhere
Now that you have a beautiful design, you can share and publish anywhere. Think photos, videos, social media, augmented reality or 3D file exports — a variety of options to fit your personal workflow.

Work in your flow
Export to file formats that allow you to work in other apps and software. uMake supports exporting to multiple file formats, including PNG, STL, IGES. You can continue your work in other apps such as Instagram, Facebook, Procreate, SketchUp, SolidWorks and more.

Augment your design
Want to see how your designs would look in the real world? View your designs in augmented reality (AR) right in uMake, or export them as USDz files and send them to anyone to view on their iOS device.

Share with others
Using the Markup tools, you can collaborate with others on your design, make changes on the go, export your creations as photos or presentations, and let others know about your ideas.
![[object Object]](https://images.prismic.io/umake/4485b773-872c-4ec8-94d5-3bde51497a5c_join0054+5.png?auto=compress,format)
Join uMake+
uMake+ is an all-in-one app where you can easily find everything you need - from Mobile and AR-friendly 3D models to materials, textures, shapes & colors. New content is added weekly.


Easy & Powerful & Precise & Design & Mobile & Content & Easy & Powerful & Precise & Design & Mobile & Content &Easy & Powerful & Precise & Design & Mobile & Content &Easy & Powerful & Precise & Design & Mobile & Content &Easy & Powerful & Precise & Design & Mobile & Content &Easy & Powerful & Precise & Design & Mobile & Content &Easy & Powerful & Precise & Design & Mobile & Content &Easy & Powerful & Precise & Design & Mobile & Content &Easy & Powerful & Precise & Design & Mobile & Content


The Basics
Learn about the initial stages of working in uMake. It's simple, fast, and efficient.

Help Videos
Get training and improve your skills using fun and supportive help videos.

How To
Learn how to design while mastering uMake with these minutes-long tutorials.

Tips and Tricks
We've developed our own tips and tricks over years of experience. Here's where we share them!
Learn Design
uMake offers hundreds of videos to help you learn design in no time. Easily search for a specific topic or watch our short and to-the-point help videos.


© 2024 uMake, Inc. All rights reserved
